How to deploy a Node Application and MongoDB Database to Heroku with MongoDB Atlas


Guide on how to deploy your Node Application and MongoDB Database to Heroku with MongoDB Atlas
Heroku is a platform as a service (PaaS) that enables developers to build, run, and operate applications in the cloud. When you sign up with Heroku, you automatically get a pool of free dyno hours to use for your apps. When your app runs, it consumes dyno hours. When it idles (automatically, after 30 minutes of inactivity), or when you scale it down, your app will stop consuming dyno hours.
MongoDB Atlas is a cloud MongoDB service. Built for agile teams who’d rather spend time building apps than managing databases, available on AWS, Azure, and GCP
Heroku Add-ons are integrated into Heroku, making it easy to install new services and manage billing, credentials, or configurations directly from your Heroku Dashboard or CLI. most of Heroku add-ons provide extended functionality within Heroku by integrating with the deploy processes, logs, platform API, and more.
Key features:
- One-click install from the Heroku Dashboard or CLI
- REST API and tooling for easy technical integration
- Integrated billing and fraud expense coverage
- Product discovery through the Heroku Elements Marketplace
- Co-marketing opportunities through Heroku channels
- Access to technical engineering resources
From December 2019, Heroku demands that applications using any add-on to the app, even if the add-on is free. The only exceptions to this are the free plans for the Heroku Postgres and Heroku Connect add-ons, which can be used without verification. What about persons who have issues verifying their accounts? MongoDB Atlas is the best option for people who may be having difficulties verifying their Heroku account and want to deploy a Node Js / MongoDB app.
Requirements
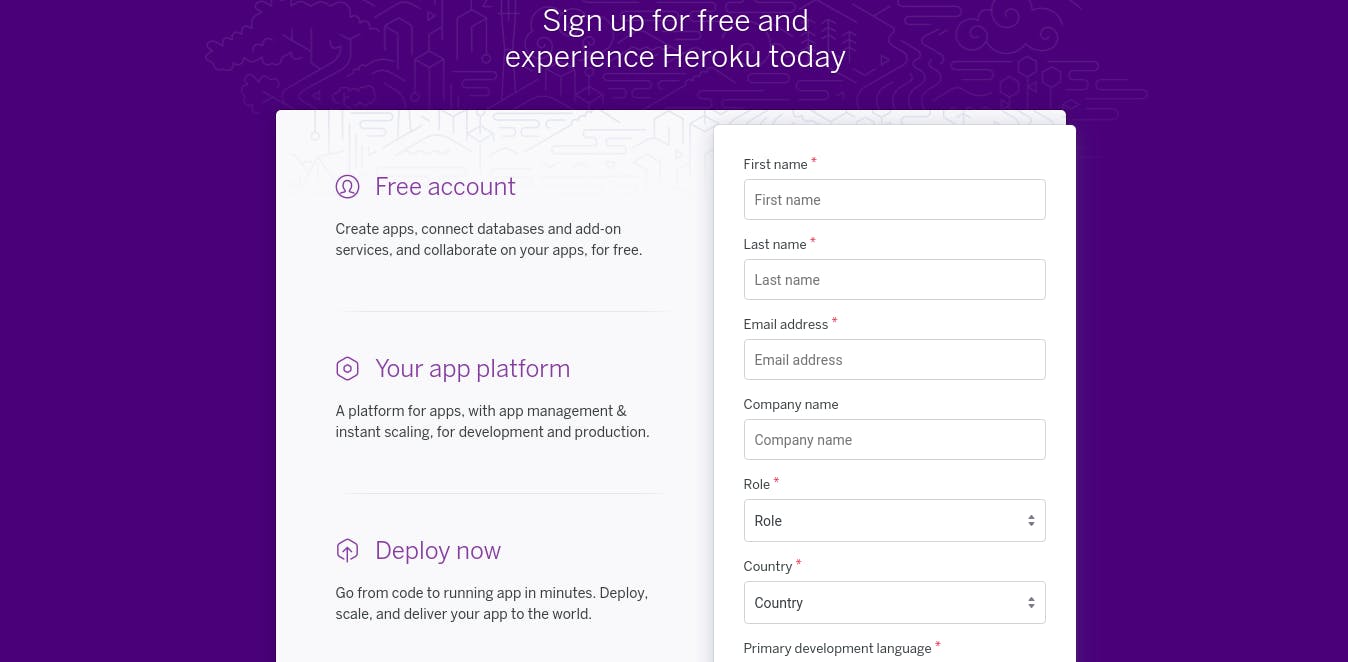
Create a free Heroku account
Creating a free Heroku account gives you free 550 dyno hours monthly for an unverified account. If you verify your account, you get extra 440 dyno hours monthly. To create a free Heroku account, go to the official heroku site and fill the form as shown below;
Install and Set-up Heroku CLI
The Heroku Command Line Interface (CLI) makes it easy to create and manage your Heroku apps directly from the terminal. It’s an essential part of using Heroku. [ Well, you can decide to use the GitHub integration feature and Heroku Dashboard but yes you should learn how to use the CLI ] Heroku CLI requires Git, the popular version control system.
1. Heroku CLI for Mac OS
brew tap heroku/brew && brew install heroku
2. Heroku CLI for Ubuntu
sudo snap install --classic heroku
3. Heroku CLI for Windows
Download the installer for 64-Bit or 32-Bit.
Install and Set-up Git
1. Install Git for MAC OS
- Download the latest Git for Mac installer.
- Follow the prompts to install Git.
- Open a terminal and verify the installation was successful by typing git --version:
$ git --version
git version 2.9.2
Install Git for Windows
Download the latest Git for Windows installer.
When you've successfully started the installer, you should see the Git Setup wizard screen. Follow the Next and Finish prompts to complete the installation. The default options are pretty sensible for most users.
Open a Command Prompt (or Git Bash if during installation you elected not to use Git from the Windows Command Prompt).
Install Git for Debian / Ubuntu
Git packages are available via apt:
From your shell, install Git using apt-get:
$ sudo apt-get update
$ sudo apt-get install git
Verify the installation was successful by typing git --version:
$ git --version
git version 2.9.2Debian / Ubuntu (apt-get)
Git packages are available via apt:
From your shell, install Git using apt-get:
$ sudo apt-get update
$ sudo apt-get install git
Verify the installation was successful by typing git --version:
$ git --version
git version 2.9.2
For other operating system, check Git documentation
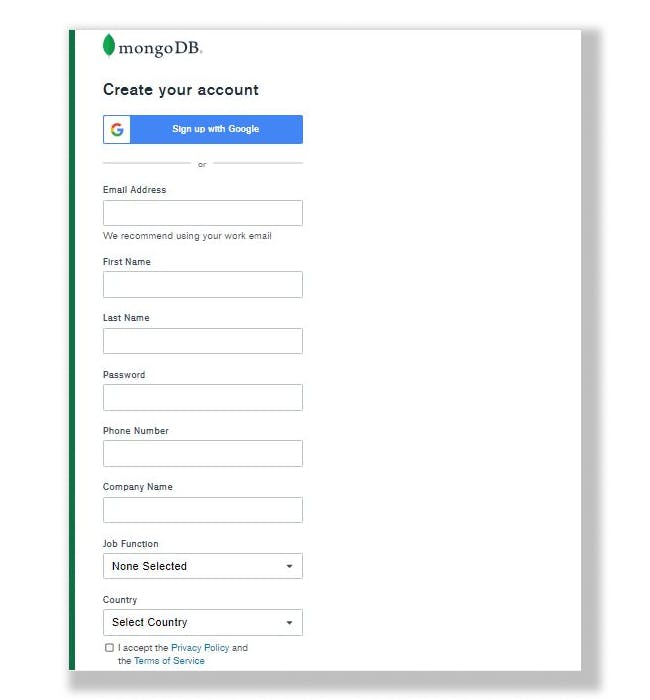
1. Create and Set-up MongoDB Atlas account
Step 1.
Click on the link below to create a free MongoDB account and fill in the fields as required.
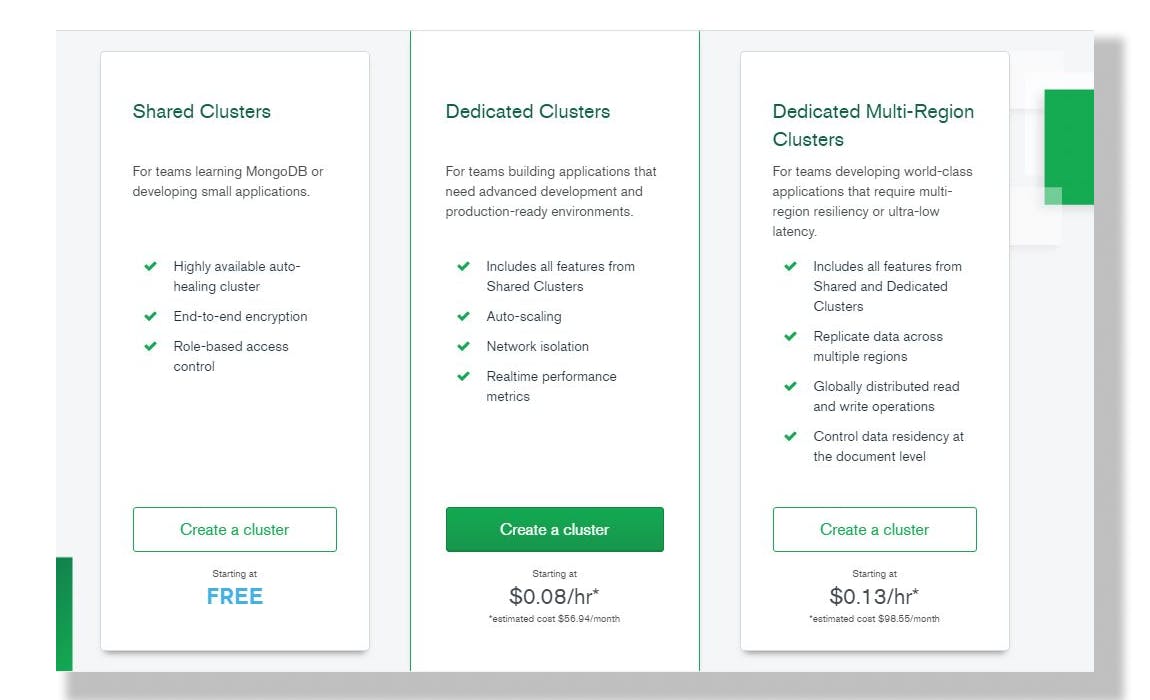
Step 2.
Choose a cluster type, for this tutorial we would be working with the shared cluster which is free.
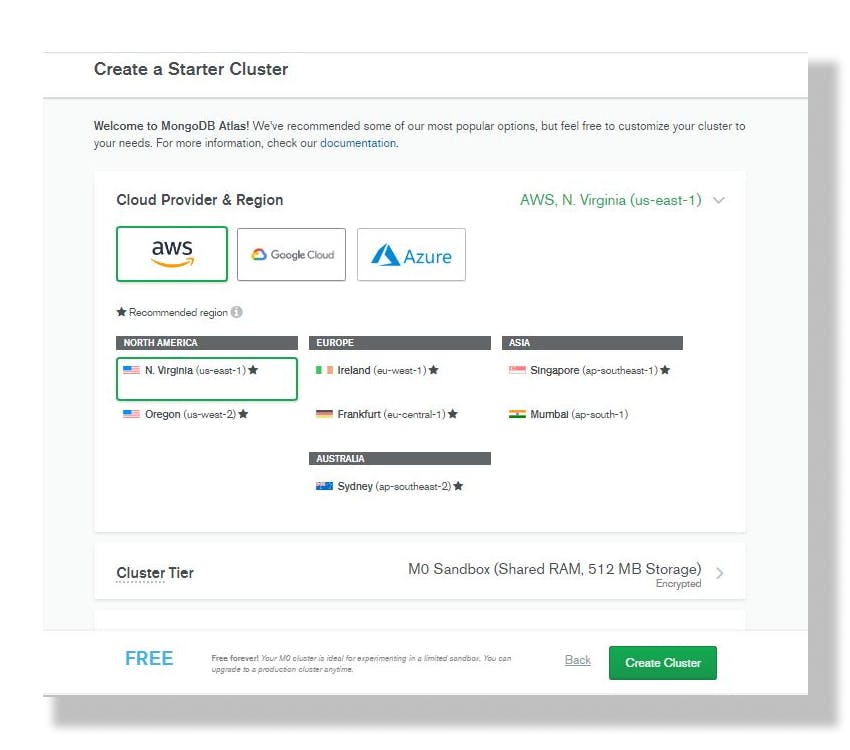
Step 3.
Choose cloud provider and and region. Click on the create cluster button as shown in the diagram below, to create a free cluster.
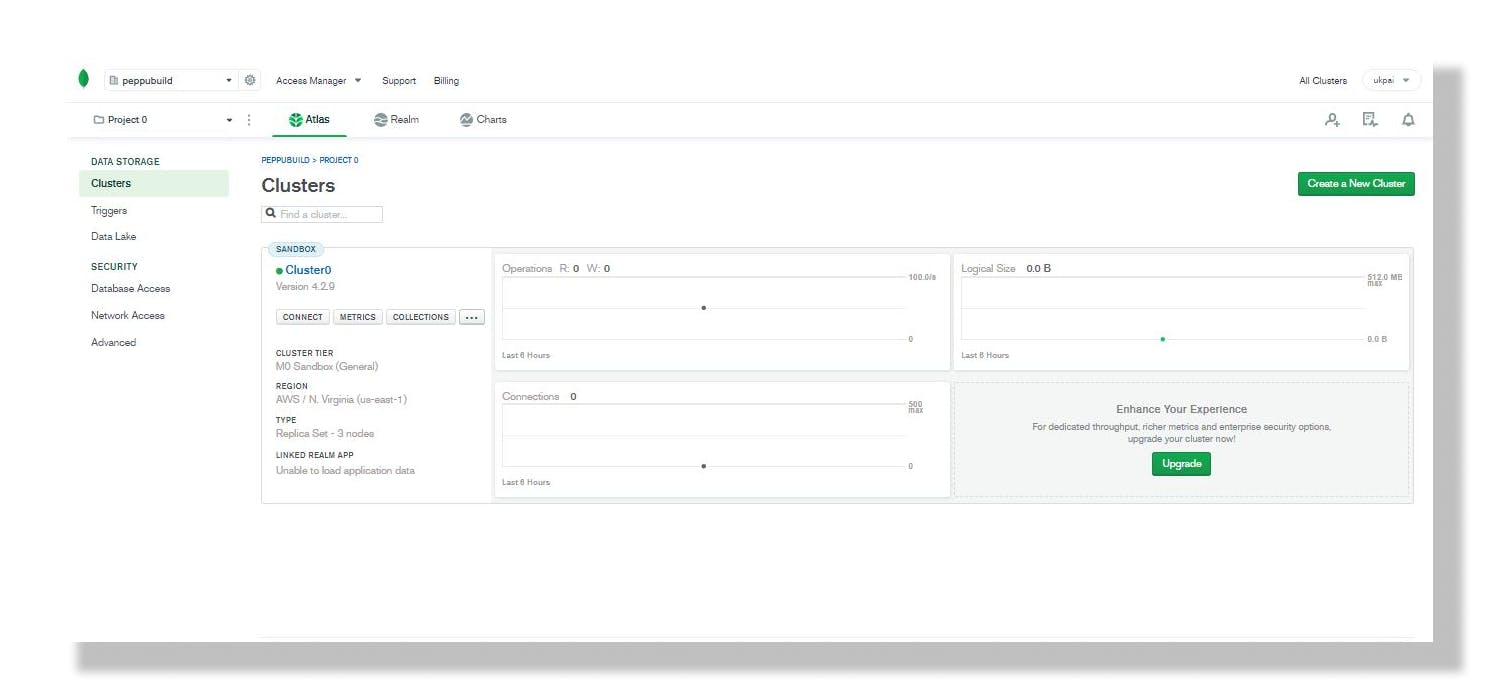
Step 4.
Click on the connect button in your cluster as shown in the diagram below to connect to your cluster.
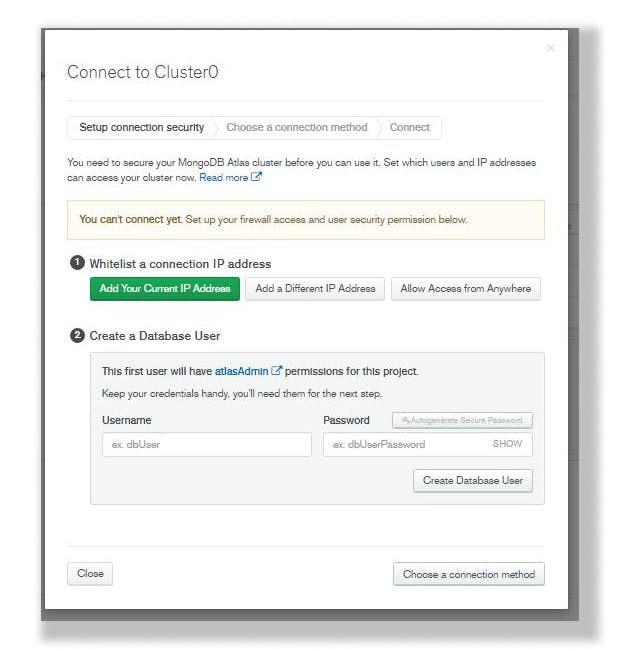
Step 5.
Click on "Add your current IP Address" under the whitelist a connection IP Address as shown below.
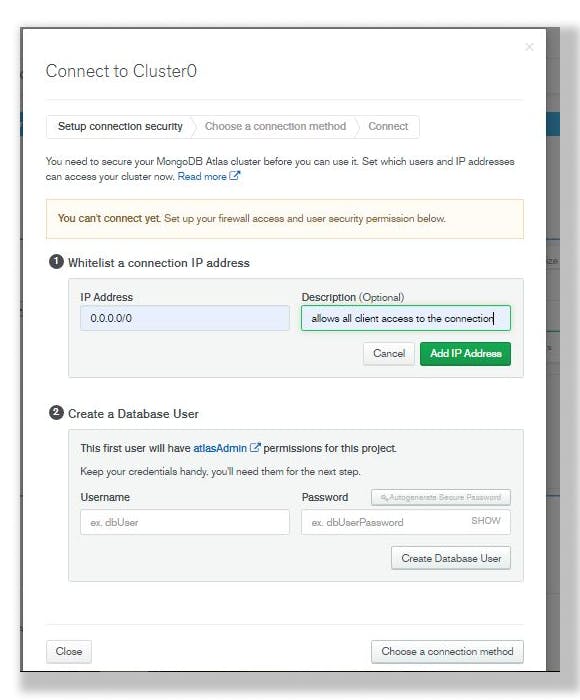
Step 6.
Fill in IP Address to 0.0.0.0/0 to allow all clients access the connection. Fill in message which is optional and click on Add IP Address as shown below.
Step 7.
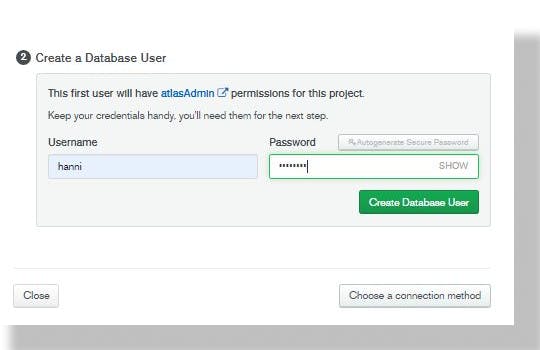
Under the "Create a database user" fill in username and password appropriately, click on "create Database user".
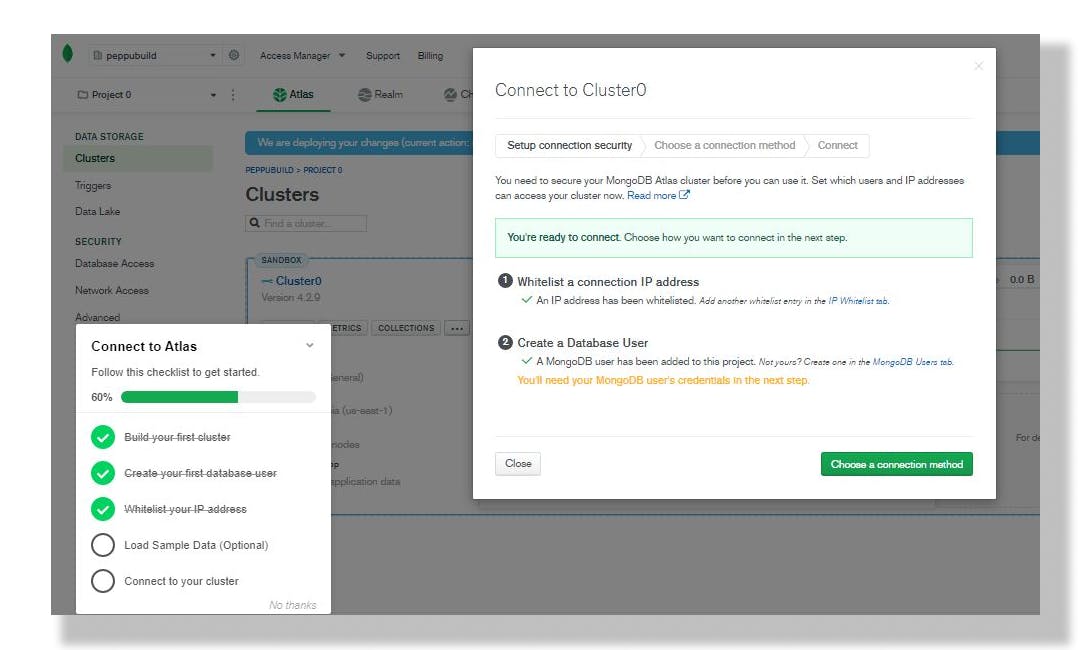
Step 8.
Click on "choose a connection method" to choose connection method, this tutorial will be working with "Connect your application method" this will connect your application to your cluster using MongoDB's native drivers. Click on the connect button to establish a connection.
I assume you have the following already:
- Node Js and Npm installed already.
- A Node Js app to be deployed
2. Create a new application on Heroku for your Node Js app
Heroku login command allows you to login to your heroku dashboard from your terminal, to allow a seemless deploy. Login with the command below and input your email address and password correctly.
heroku login
In your Node Js application, replace your "PORT" value to "process.env.PORT" or your initial port configuration as shown below:
const PORT = process.env.PORT || 3000;
My initial port configuration is set at "3000" for localhost before configuration and is set now to "process.env.PORT" because some other user may be using port 3000 and my application may never be served because port 3000 is busy. "process.env.PORT" tells Heroku to serve my application in any available port if port 3000 is occupied.
The heroku create CLI command creates a new empty application on Heroku, along with an associated empty Git repository. If you run this command from your app’s root directory, the empty Heroku Git repository is automatically set as a remote for your local repository.
$ heroku create ugochimyapp
Creating ⬢ ugochimyapp... done,
https://ugochimyapp.herokuapp.com/ | https://git.heroku.com/ugochimyapp.git
You can use the git remote command to confirm that a remote named heroku has been set for your app (After your application name):
$ git remote -v
heroku  https://git.heroku.com/ugochimyapp.git (fetch)
heroku  https://git.heroku.com/ugochimyapp.git (push)
To allow Git initialize your app, use the Git init command
git init
To avoid Git initializing the node modules folder and package-lock.json file, create a .gitignore file in the root of your folder and add the following to the file you just created.
node_modules
package-lock.json
Add changes made by using the Git add command
git add .
Commit changes made with a message with the Git commit command as shown below:
git commit -m "message"
3. Deploying your Node Js app on Heroku
To deploy your app to Heroku, you typically use the git push command to push the code from your local repository’s master or main branch to your heroku remote, like this:
$ git push heroku master
Initializing repository, done.
updating 'refs/heads/master'
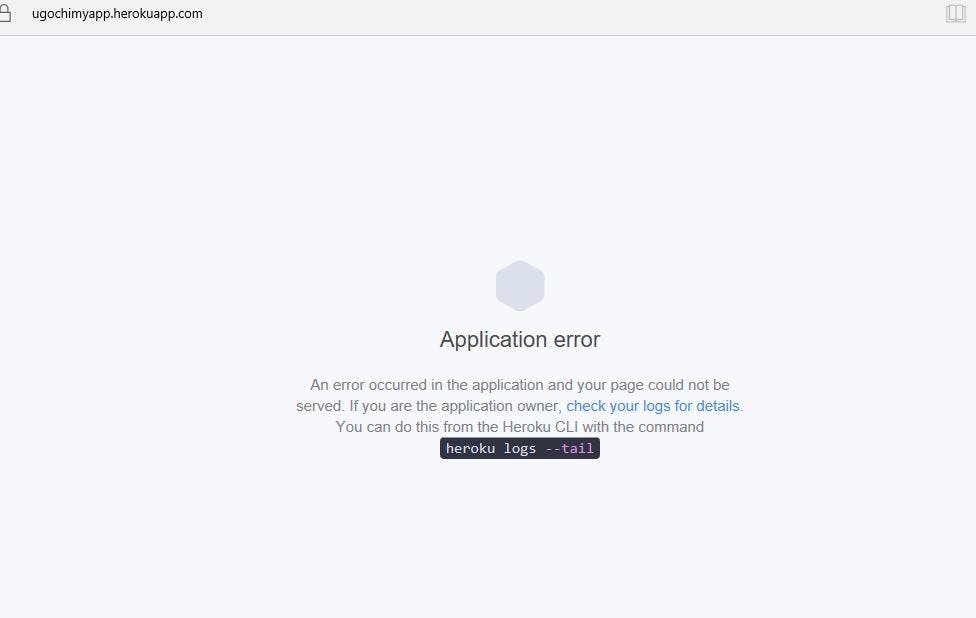
If you try to navigate to your Heroku app URI, you will get an error as shown below if your app is not connected to MongoDB Atlas:
4. Linking your Heroku app to MongoDB Atlas
To Link your Heroku app to your MongoDB Atlas account, Copy connection string which is in the "choose a connection method", it looks like this:
mongodb+srv://hanni:<password>@cluster0.txl4w.mongodb.net/<dbname>?retryWrites=true&w=majority
Replace with the password for the hanni user; hanni is my username. Replace with the name of the database that connections will use by default.
- Create a .env file in the root of your application folder and paste the connection string in this manner:
MONGODB_URL = 'mongodb+srv://hanni:<password>@cluster0.txl4w.mongodb.net/<dbname>?retryWrites=true&w=majority'
- In your mongoDB connection string on your Node Js app, add the following code to connect to your .env file;
const dotenv = require('dotenv');

const mongoose = require('mongoose');
require('dotenv').config();

mongoose.connect(process.env.MONGODB_URL||'mongodb://localhost:27017/TLN', (err) =>{
    if (!err)
       console.log('mongodb connected successfully');
    else
    console.log('Error in DB connection:' + JSON.stringify(err, undefined, 2));
});
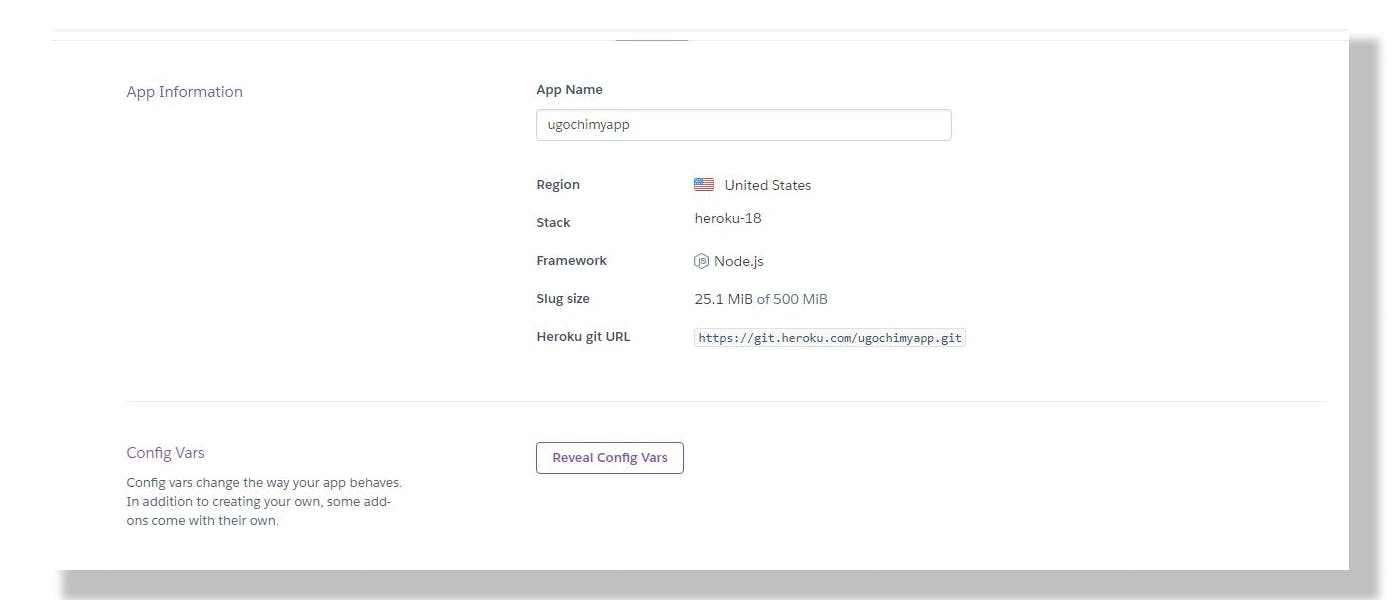
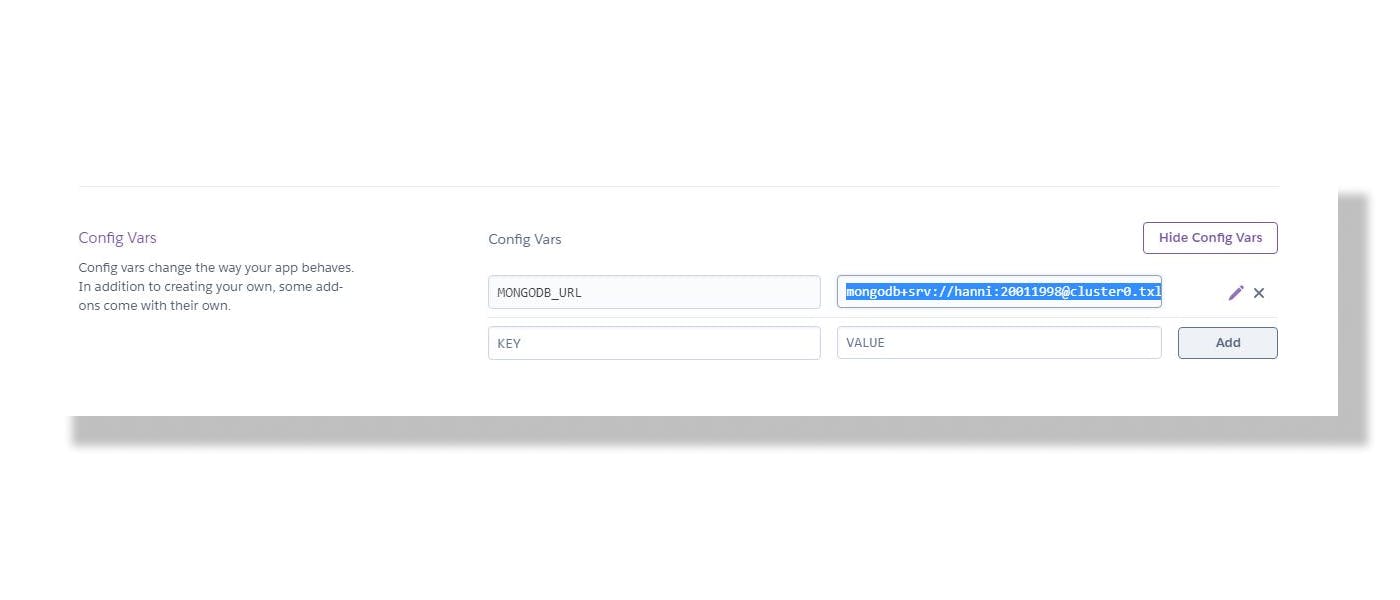
- Go to your Heroku Dashboard settings and click on Reveal config Vars as shown below:
- Click on Add config, KEY =
"MONGODB_URL"VALUE ="mongodb+srv://hanni:<password>@cluster0.txl4w.mongodb.net/<dbname>?retryWrites=true&w=majority". As we have written in our .env file.
- Use the Git add, Git commit and Git Push command to deploy the changes in your Heroku application
P.S: Always rename "hanni" which is my username and "password" to your username and password values respectively.
Conclusion
In this tutorial, we have successfully deployed our Node Js / MongoDB app on Heroku using MongoDB Atlas, we have seen how to set-up our environment to successfully deploy to Heroku by installing and setting up Heroku CLI and Git.
We also created a MongoDB Atlas account to recieve free 512MB storage and Heroku free account to recieve 550 Dyno hours. We used the .gitignore file to hide our package.json lock and node modules from git.
We used the Git add . command to add changes, Git commit -m "message" command to commit our changes and git push heroku master command to push our app to Heroku.
We set up our MongoDB Atlas account, and linked it to our Heroku account, to finish our app deploy.
Thank you so much for reading this article till the end! you can contact me on twitter or send a mail if you have any questions regarding this article or suggestions.