


Guide to deploy your Vue Js site to Netlify and fix "Page not found error"
Vue Js is a javaScript framework that let's you build MPA's(Multi-Page Applications) and SPA's (Single Page Applications) easily. Deploying a Vue SPA on Netlify would throw a "Page not found" error while you try to navigate to another route.
In this article, I will show you how to successfully deploy a Vue SPA and fix "Page not found error" that will occur while you try to refresh any page on your url other than ' / ', or if you try to directly access a url on your site other than ' / '.
Deploying to Netlify
Netlify is a web developer platform that let's you host your static sites for free. With Netlify's continuous deployment integration, synchronization with GitHub, GitLab or Bitbucket allows swift serving of sites and continuous deployment anytime you push (make a change in file(s)) to your served repository in any of the Git provider.
Deploying a site to Netlify requires the three (3) steps that are listed below:
1. Connect to Git provider (GitHub, Bitbucket, GitLab)
2. Pick a Repository
3. Build Options, and Deploy
Step 1: Connect to Git provider (GitHub, Bitbucket, GitLab)
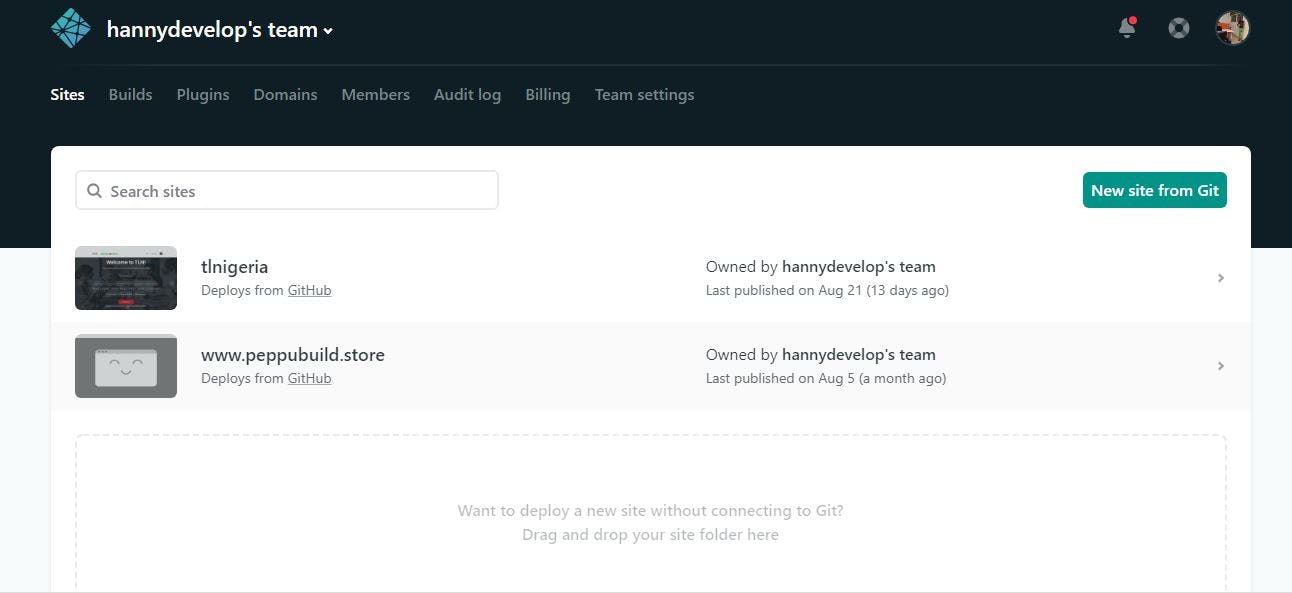
- To connect to a Git provider, you need to create a new site, navigate to the sites section of your team's dashboard and click on "New site from git" as illustrated by the picture below
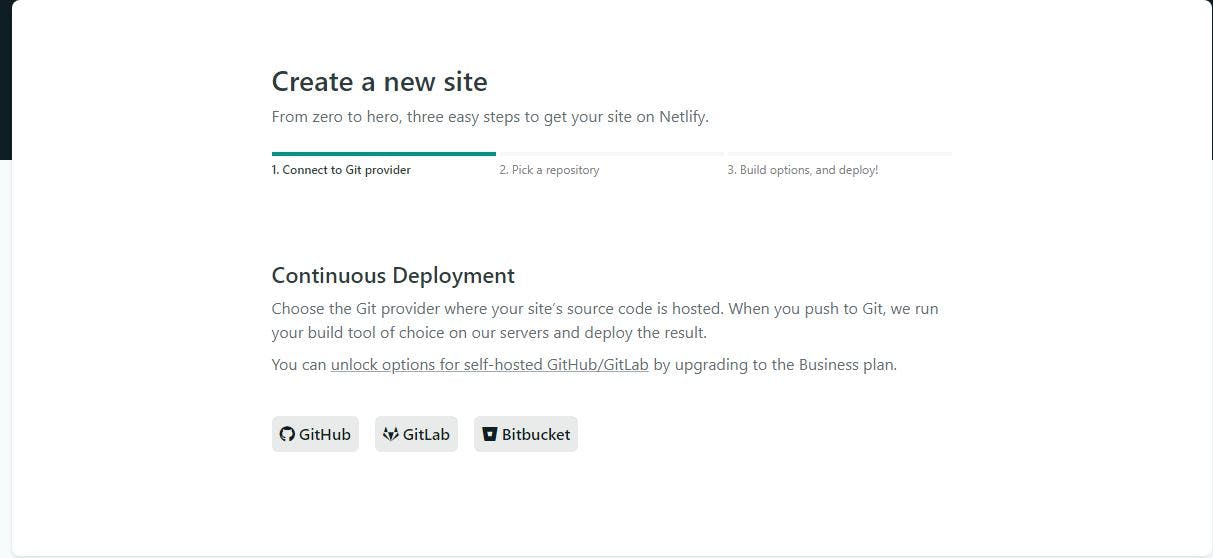
- On the continuous deployment section as shown by the diagram below, choose the Git provider of your choice, this tutorial will be working with GitHub.
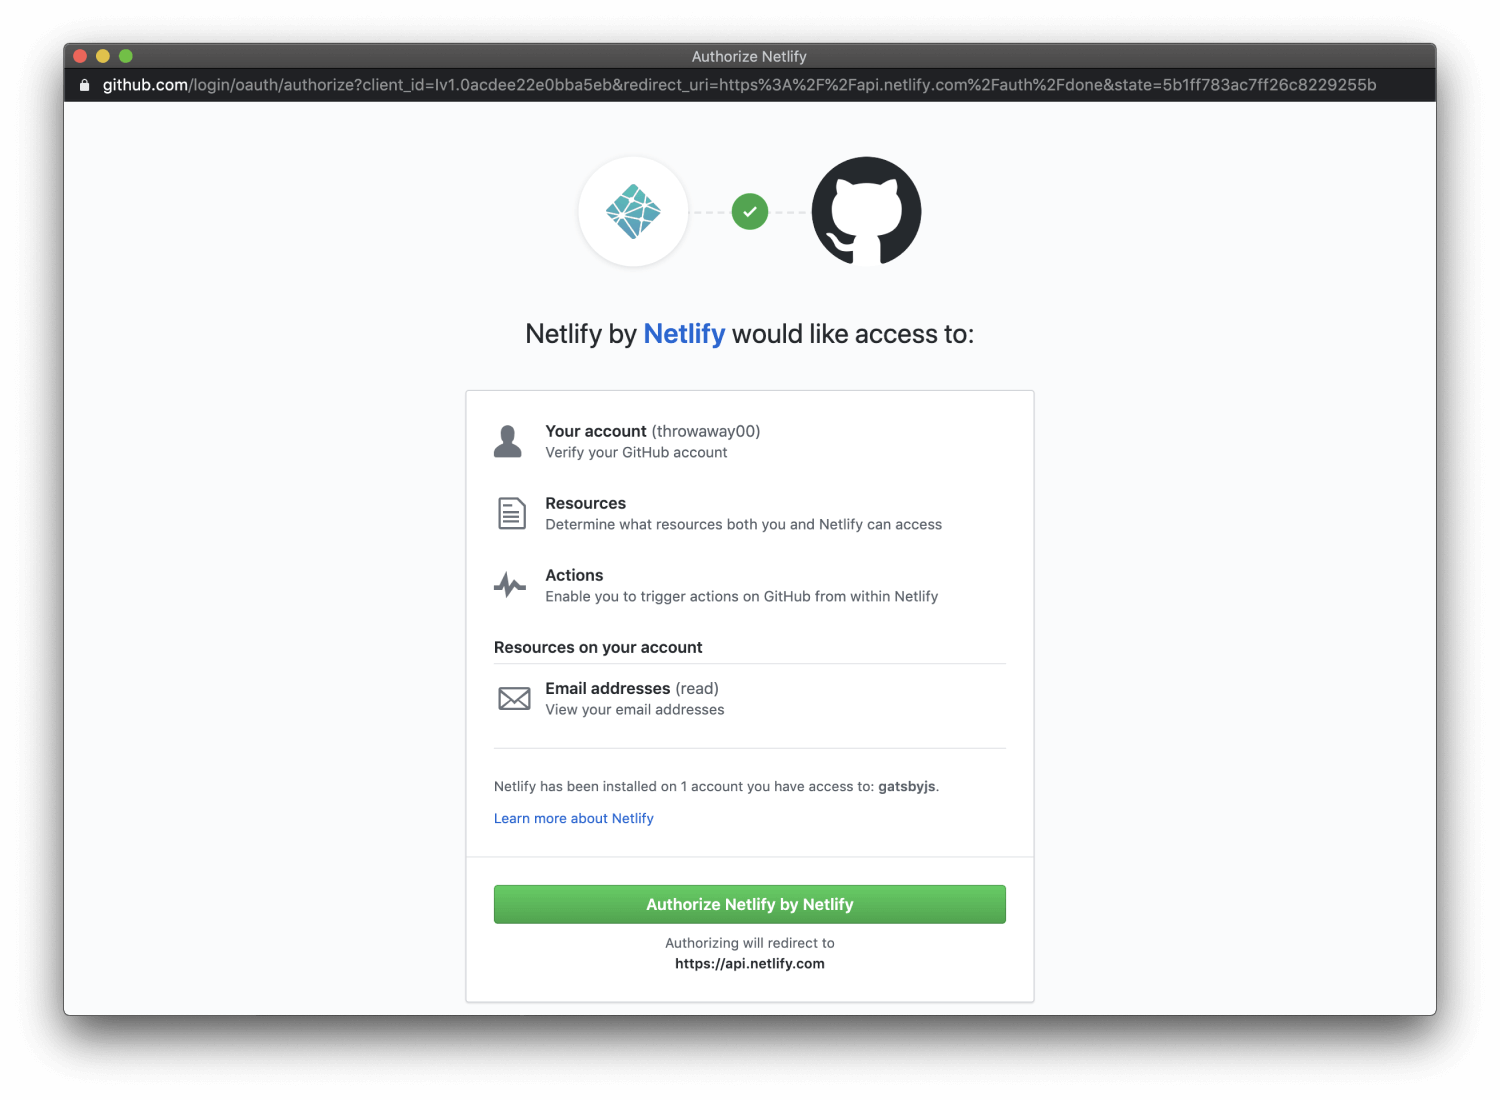
- To allow continous deployment from GitHub to Netlify, you will need to Authorize Netlify. Click on the Authorize Netlify by Netlify button as shown by the image below.
Step 2: Pick a Repository
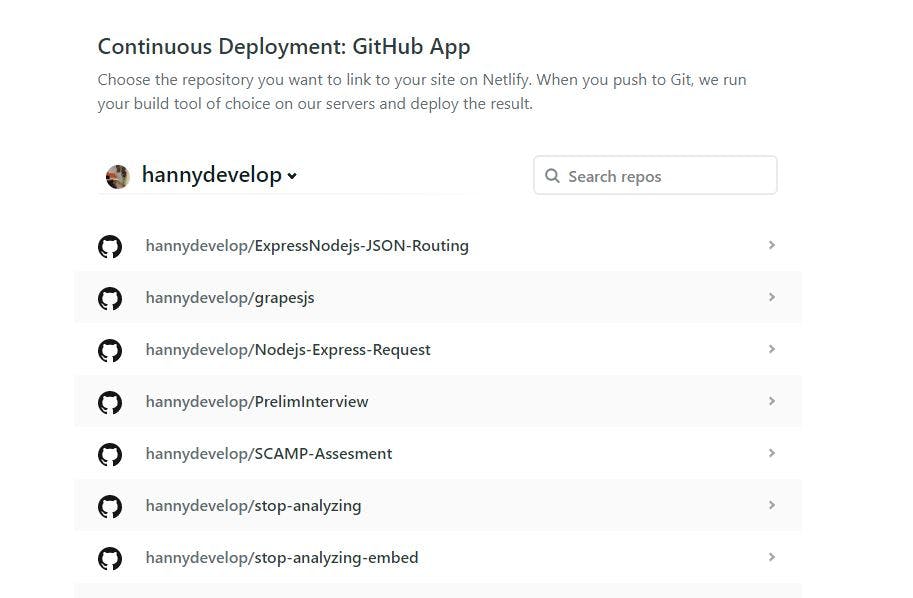
After successfully Authorizing Netlify to your Github account, your public and private repositories are shown in the continuous deployment section as illustrated by the diagram below. Pick the repository you wish to publish.
Step 3: Build Options, and Deploy
Deploy Settings for your site comes with four options, two of these options are basic build settings if you are using a static site generator or build tool. Vue js uses a build tool, therefore all four options should be filled.
Owner: This should contain the name of the site's owner.
Branch to deploy: This should contain the branch of the repository you wish to deploy, it could be the master branch or some other branch you created. it's always set to "master" by default.
Build Command: For Vue Js, the build command is "npm run build" just as it is set in your package.json file.
Publish Directory: For Vue Js, the Publish directory is the "dist" folder since it houses the static folder where all your built files will be put into.
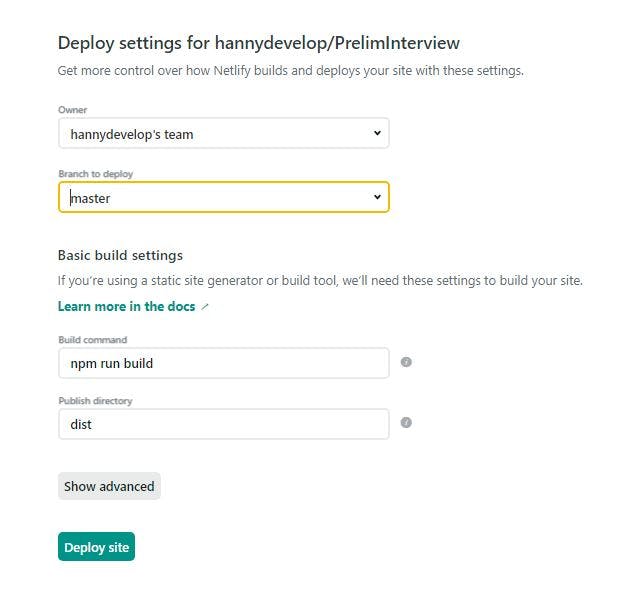
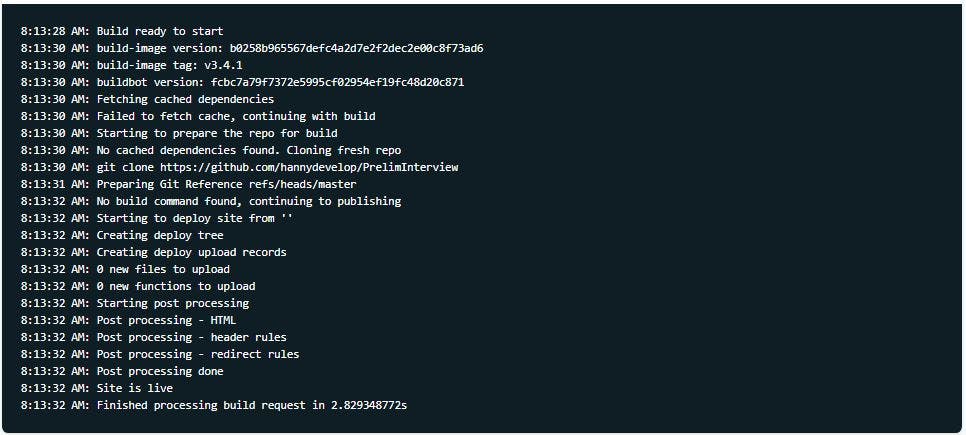
Click on deploy site, when build is complete you can change site name since netlify auto-generates a name for your new site. We are going to click on the link to our app on the deploys section and it would take us to our newly deployed site.
Trying to navigate from one route to another while trying to refresh our page will show a
"page not found error"
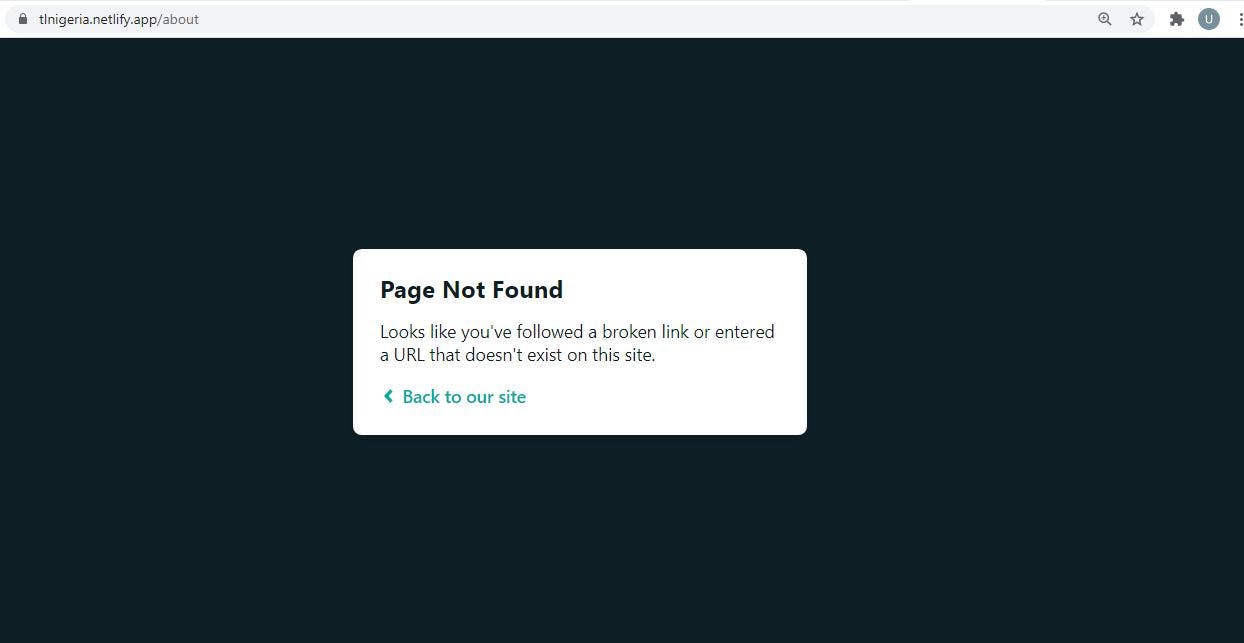
Why Page Not Found Error occurred
Vue-Router is the official router for Vue.js, with Vue-Router making Single Page Applications in Vue.js is easier and simpler.
The default mode for Vue-Router is hash mode, it uses URL hash to simulate a full URL so that the page won't reload when the URL changes. Most times to get rid of the hash(#) in the URL we make use of Vue-Router's history mode which uses the history pushstate API to allow URL navigation without a page reload and get's rid of the hash in our URL as well.
Fix Page Not Found Error
Since Vue-Router's history mode uses the "history.pushState" API to enable clean URLs, we need to enable "history.pushState" by writing a "rewrite" rule.
To Fix Page not found error, we are going to make a "rewrite" file in our root folder.Create a file in the root of your project folder as shown in the diagram below named "netlify.toml" and paste the following codes into it:
[[redirects]]
  from = "/*"
  to = "/index.html"
  status = 200
 When you assign an HTTP status code of
 "200" to a redirect rule, it becomes a "rewrite". This would allow the visitor's URL remain the same while Netlify's servers fetch the new location behind the scenes.
Since Netlify is on continuous deployment, it will start deploying once a change has been made to your repository. Go to your site and try out your different routes, to see the "page not found error" has been fixed.

Notice that this solution will serve the index.html instead of giving a
"404"no matter what URL the browser requests. This means that if a user inputs a wrong URL, the user would be redirected to your home page instead of a 404 page.
Solution
To redirect a user to a "404" page when they input an invalid URL, create a new route in your router/index.js file and input the following:
  {
      path: '*',
      name: '/errorPage',
      component: errorPage
    }
The '*' on the path means whenever an invalid URL is requested, the errorPage should be served. The name of the component is 'errorPage', it can take any name you wish, it should display the required "404 error message".
Conclusion
In this article, we covered how to deploy a Vue.js Single Page Application (SPA) on Netlify and how to fix "page not found error" that occurs while trying to refresh any page on your url other than '/'. We also covered how to redirect users to a "404" page when they input an invalid URL.
Thank you so much for reading this article till the end! you can contact me on twitter or send a mail if you have any questions regarding this article or you need me to add, correct or remove anything from this article.